Complete Steps to Enable HTTPS for a Hugo Site
Google is reportedly strengthening warnings for HTTP pages, so I decided to enable HTTPS for this personal blog with low traffic. Here’s a memo of the steps I took.
Issuing a Free Server Certificate Using ACM
When Using Email Verification
From the AWS console, select Certificate Manager.
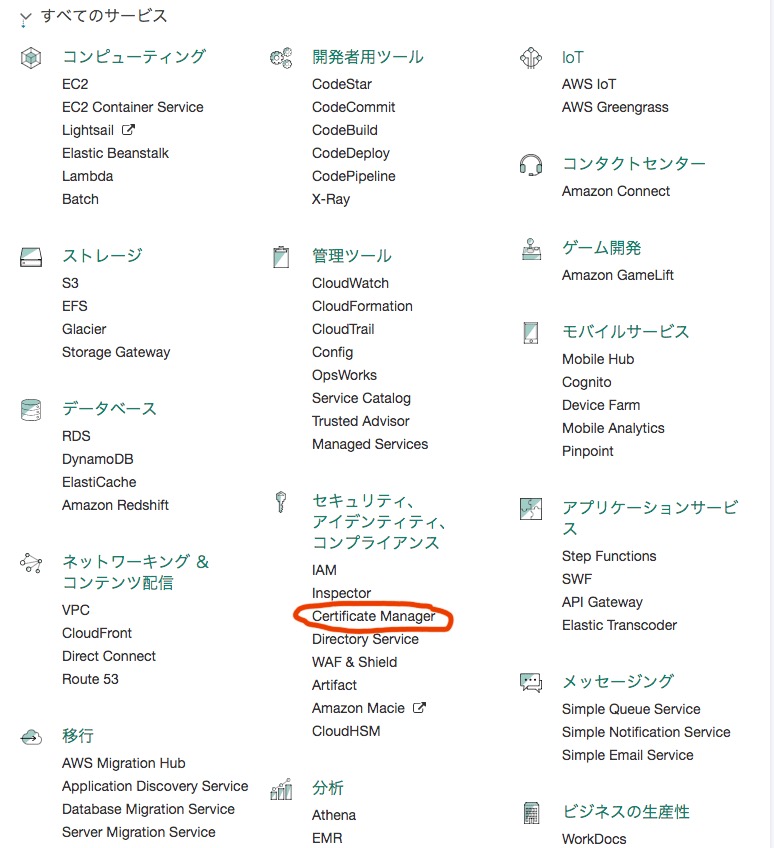
One important note: set the region to Northern Virginia (as of October 2017). If you select the wrong region, the process will not work.

Next, select Request a Certificate.
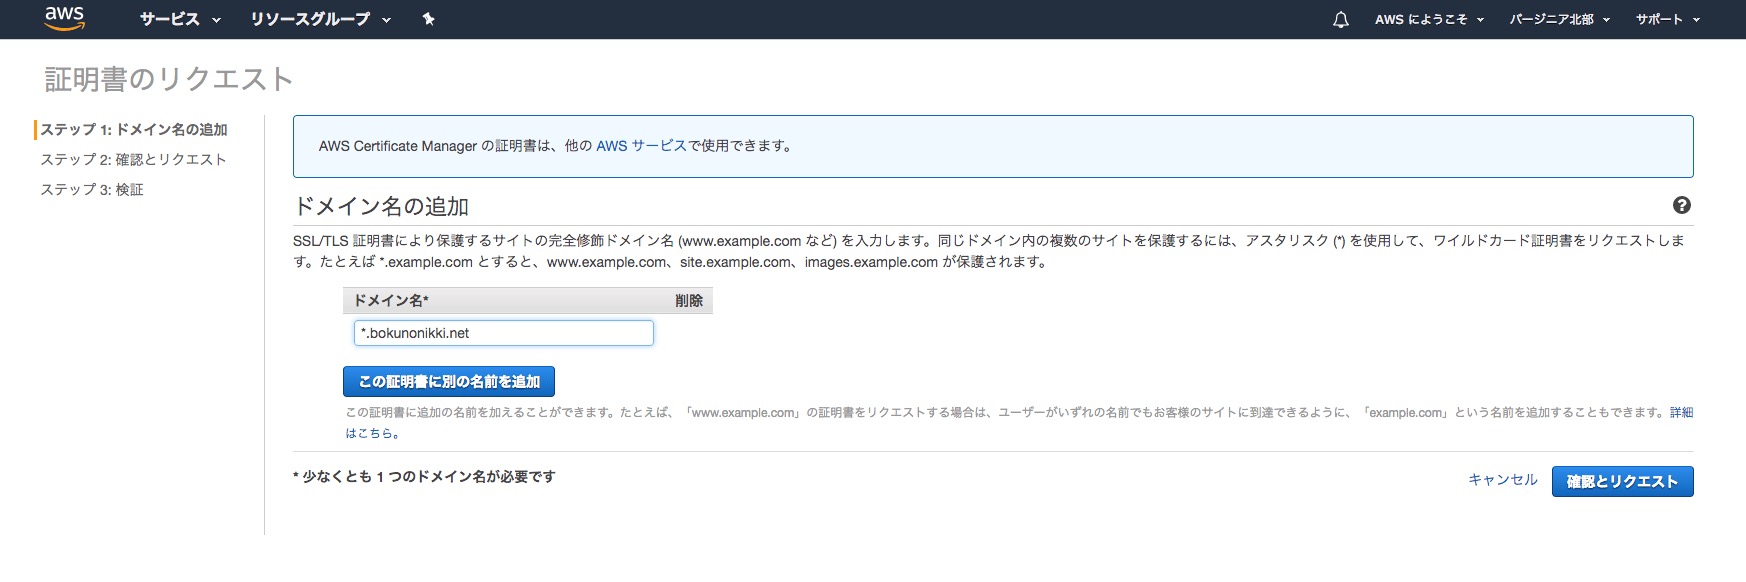
Enter your domain and select Review and Request.
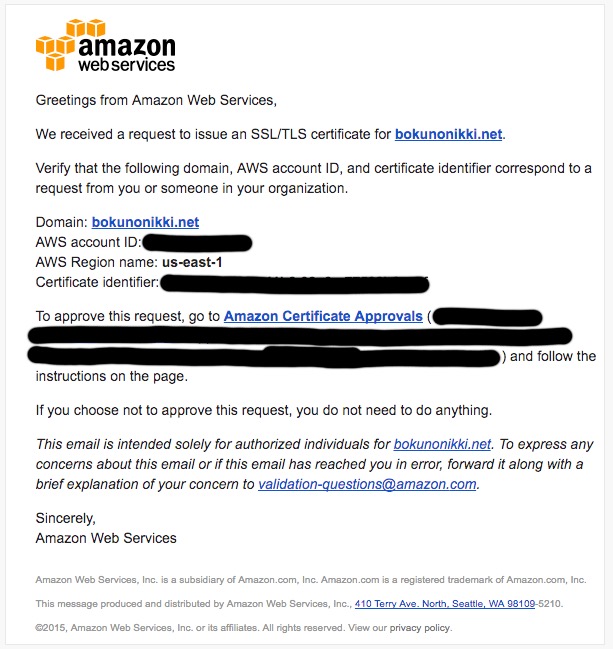
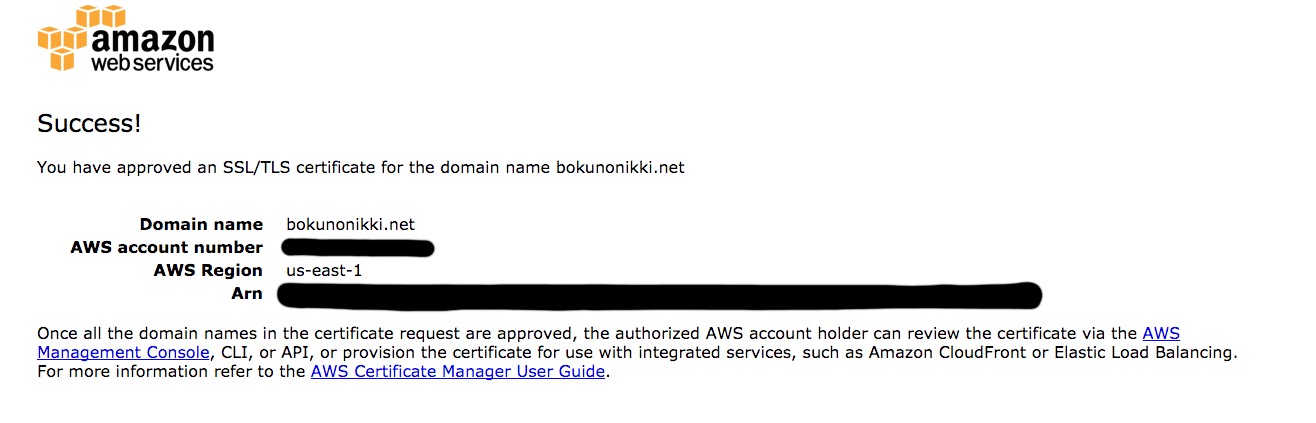
After a while, you’ll receive a domain verification email from AWS.
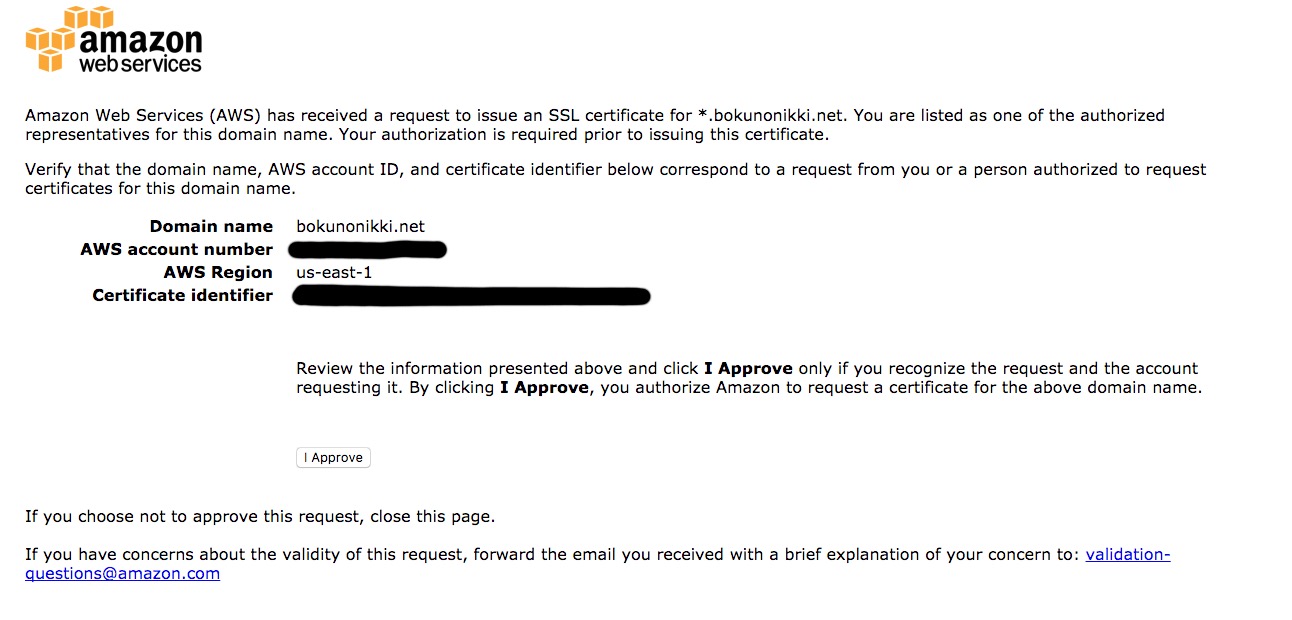
Approve it by clicking I Approve.
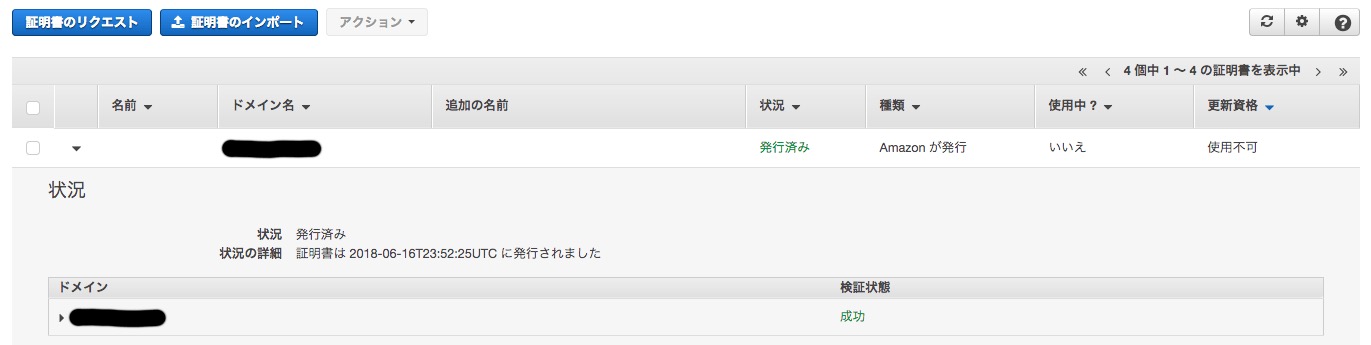
Once approved, you’ll see Success! displayed.
If everything goes well, the status will show as “Issued.” This completes the steps for issuing a free server certificate using ACM.

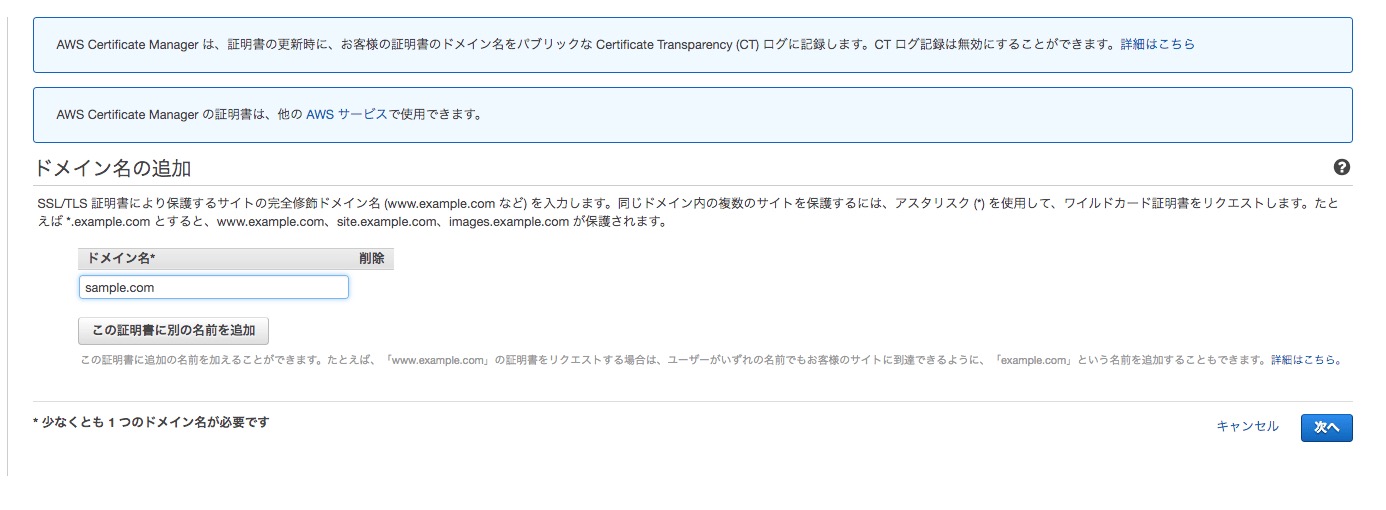
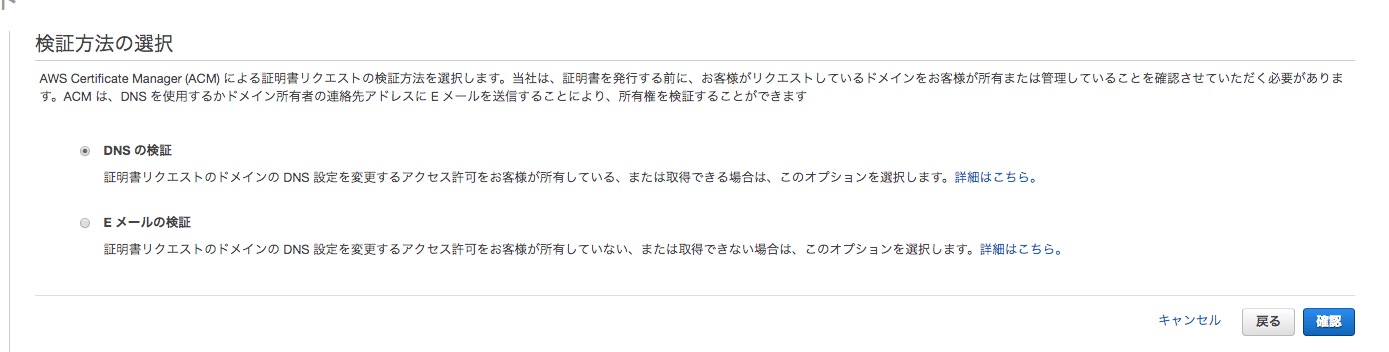
When Using DNS Verification
Enter the domain name.
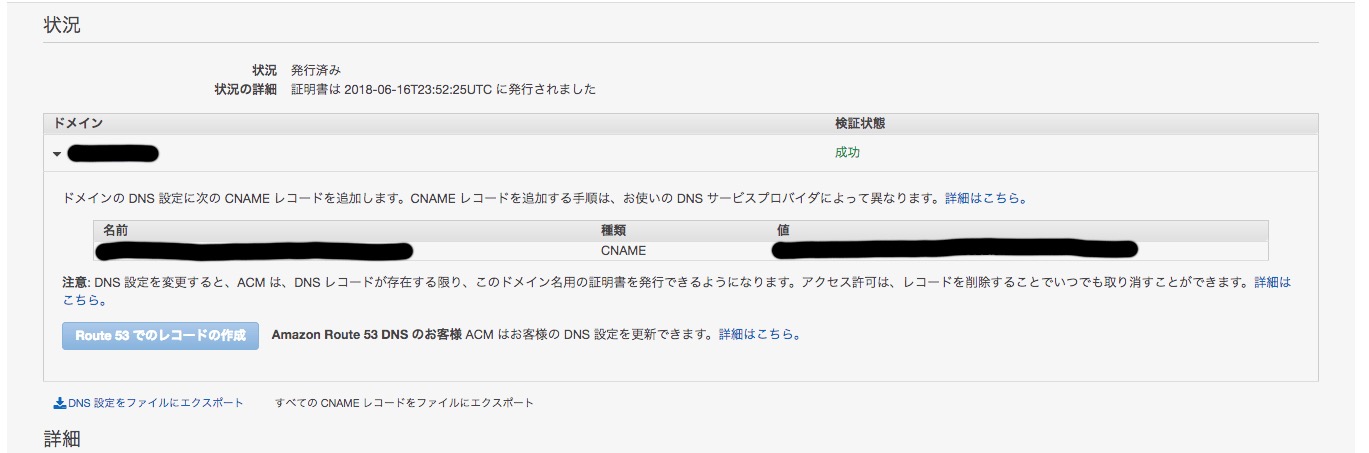
Select DNS Verification.
Since this blog’s domain was obtained using Route53, select Create Record in Route53. After a while, it will succeed.
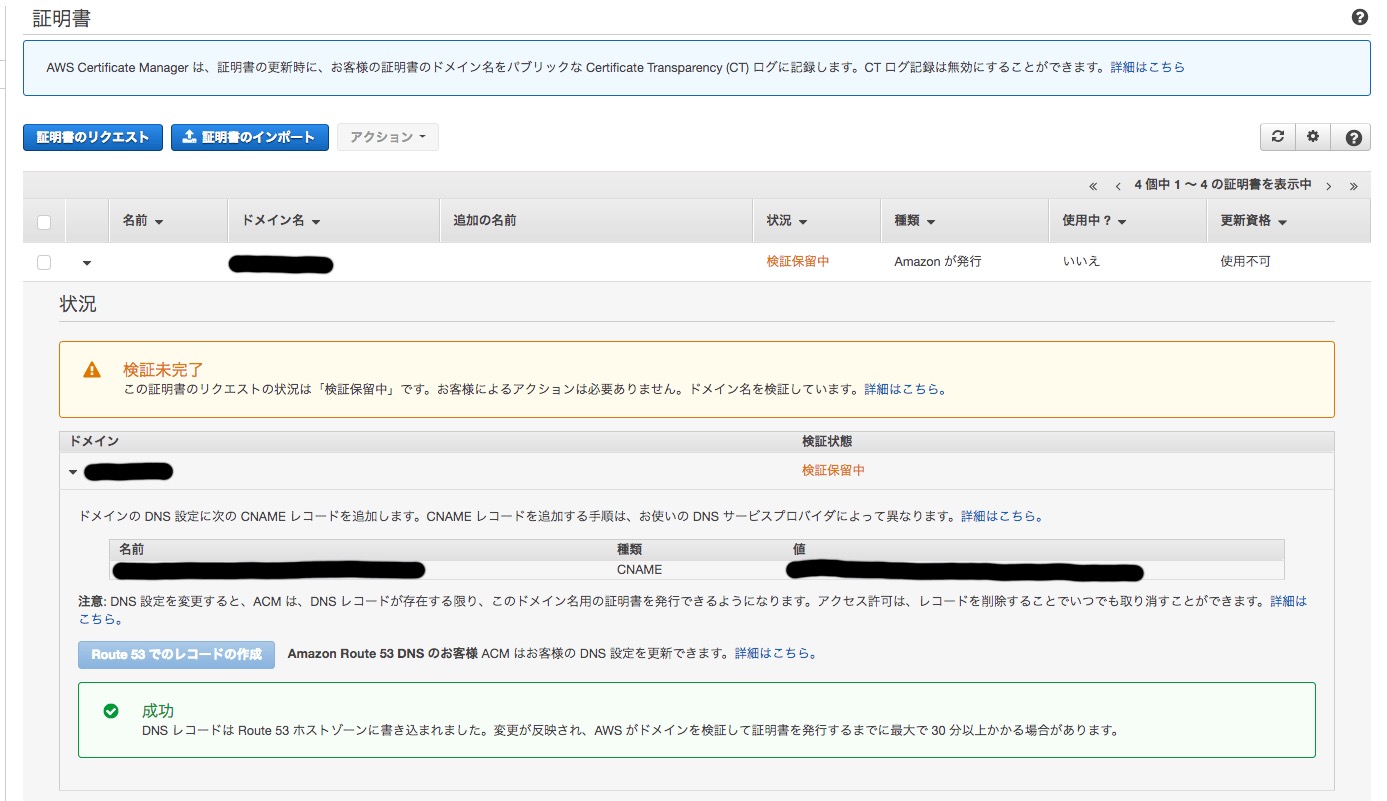
It will look like this.
Success.
CloudFront Configuration
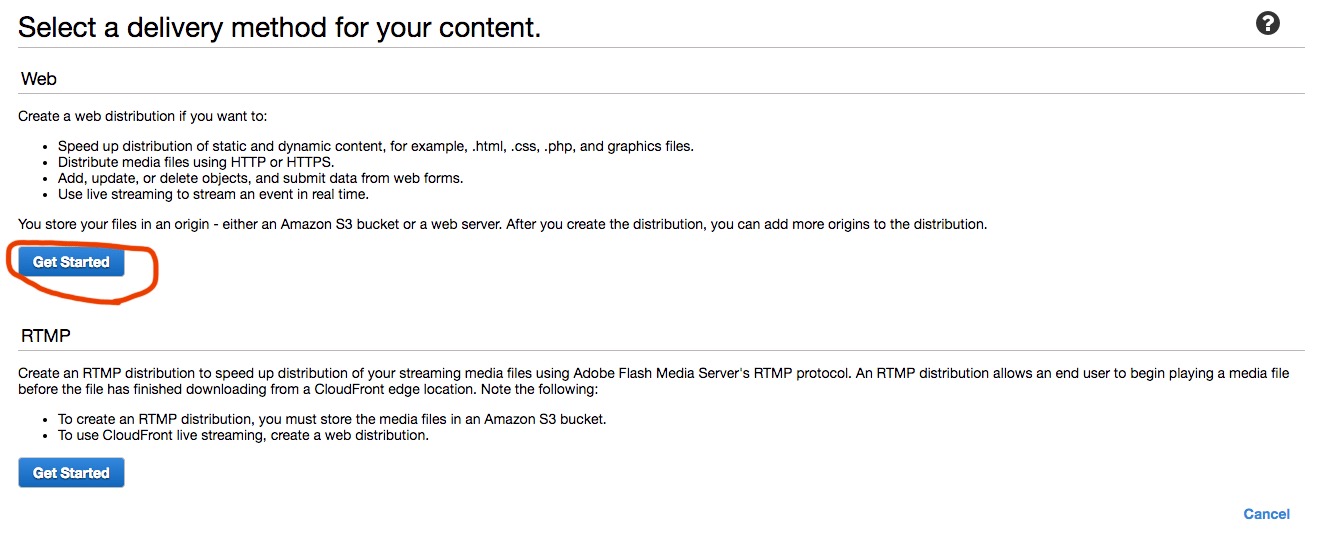
Select Create Distribution.

Select Get Started under Web.
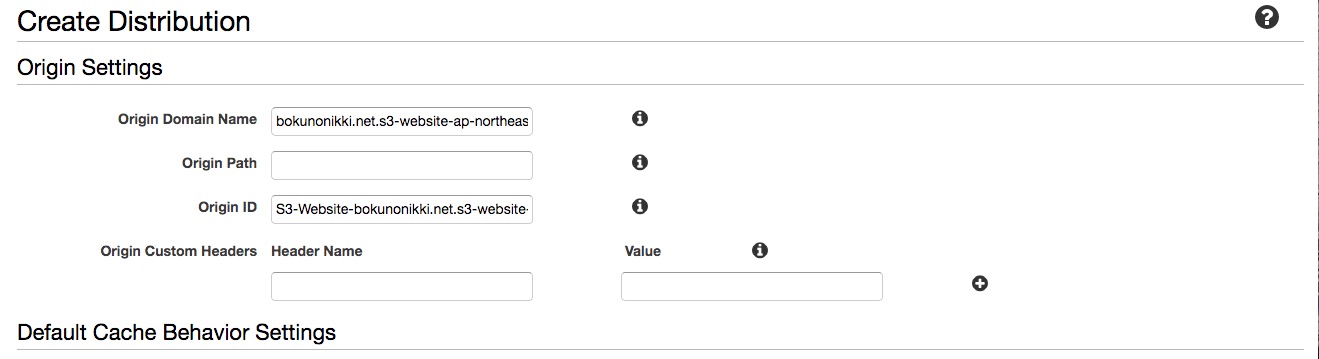
In the Origin Domain Name field, enter the domain name of the origin server. Note: copy and paste the S3 endpoint. Do not select the automatically displayed option. The automatically displayed option looks like this:
shou2017.com.s3.amazonaws.com ← This won’t work.
http://shou2017.com.s3-website-ap-northeast-1.amazonaws.com/ ← Copy this from the endpoint.
It will look like this:
Next, select Custom SSL Certificate and specify the server certificate created earlier.
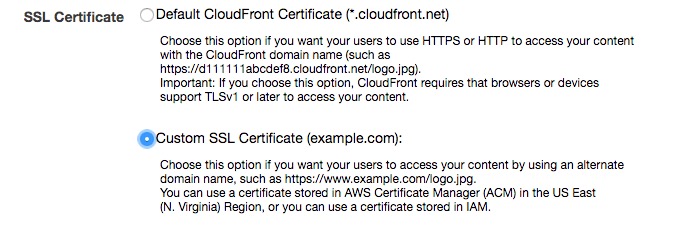
Be sure to enter your domain in Alternate Domain Names (CNAMEs).

The default settings are fine, but for better site performance, change Compress Objects Automatically to Yes. This completes the CloudFront configuration.
Route53 Configuration
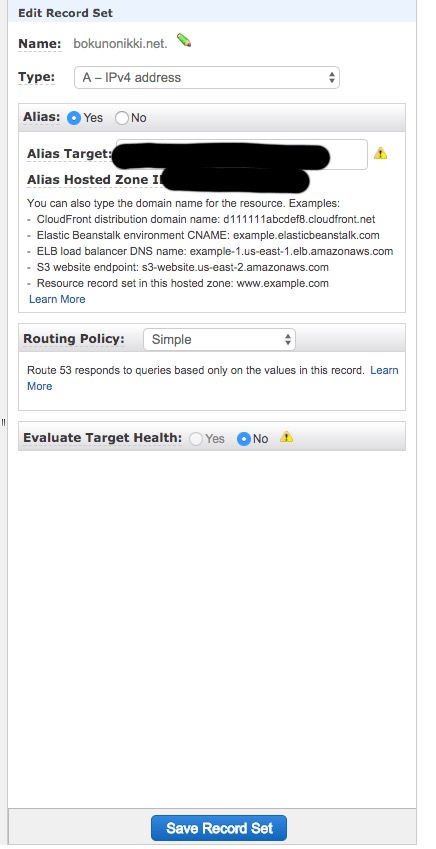
When using only S3 and Route53, the ALIAS was set to S3. Change this to CloudFront.

If the CloudFront configuration is complete, it will appear in the Alias Target. Select it.
Hugo Configuration
Change the baseURL in config.toml.
baseURL = "https://shou2017.com"
Bonus: S3 Bucket Policy Configuration
When trying to run a static site generated by Hugo, I followed the guide [CloudFront + S3] Restricting Access to a Specific Bucket from a Specific Distribution, but it didn’t work.
The error looked like this. The index page displayed, but other pages did not.
<Error>
    <Code>AccessDenied</Code>
    <Message>Access Denied</Message>
    <RequestId>E193C9CDF4319589</RequestId>
    <HostId>
xbU85maj87/jukYihXnADjXoa4j2AMLFx7t08vtWZ9SRVmU1Ijq6ry2RDAh4G1IGPIeZG9IbFZg=
    </HostId>
</Error>
The issue was with the Origin Access Identity settings. If you configure it straightforwardly, an S3 bucket policy is automatically created, and it looks like this:
{
    "Version": "2008-10-17",
    "Id": "PolicyForCloudFrontPrivateContent",
    "Statement": [
        {
            "Sid": "1",
            "Effect": "Allow",
            "Principal": {
                "AWS": "arn:aws:iam::cloudfront:user/CloudFront Origin Access Identity E21XQ8NAGWMBQQ"
            },
            "Action": "s3:GetObject",
            "Resource": "arn:aws:s3:::myhost.com.cdn/*"
        }
    ]
}
The mistake here is in the Principal section. It should be like this:
"Principal": {
                "AWS": "*"
            },
Reflection
Changing to HTTPS later is a hassle, so next time, I’ll start with HTTPS from the beginning.