Differences Between Debugging with RubyMine and pry-byebug
I got carried away and bought RubyMine.
This time, I’ll briefly introduce the differences between debugging with RubyMine and pry-byebug.
First, let’s start with the well-known pry-byebug. I’ll use Atom as the editor.
pry-byebug
Requirements
Add the following to your Gemfile:
group :development, :test do
  gem 'pry-rails'
  gem 'byebug'
  gem 'pry-doc'
end
After adding, run bundle install as usual.
Then, simply add binding.pry to the location where you want to debug, like this:
def create
  @micropost = current_user.microposts.build(micropost_params)
  if @micropost.save
    binding.pry
    flash[:success] = "Micropost created!"
    redirect_to root_url
  else
    @feed_items = []
    render 'static_pages/home'
  end
end
Next, check it in the terminal:
def create
  @micropost = current_user.microposts.build(micropost_params)
  if @micropost.save
 9:     binding.pry
     flash[:success] = "Micropost created!"
     redirect_to root_url
   else
     @feed_items = []
     render 'static_pages/home'
   end
 end

[1] pry(#<MicropostsController>)> @micropost
=> #<Micropost:0x00007fc50a0661f8
id: 302,
content: "test",
user_id: 1,
created_at: Wed, 09 May 2018 11:57:43 UTC +00:00,
updated_at: Wed, 09 May 2018 11:57:43 UTC +00:00,
picture: nil>
RubyMine
Requirements
$ gem install ruby-debug-ide
$ gem install debase
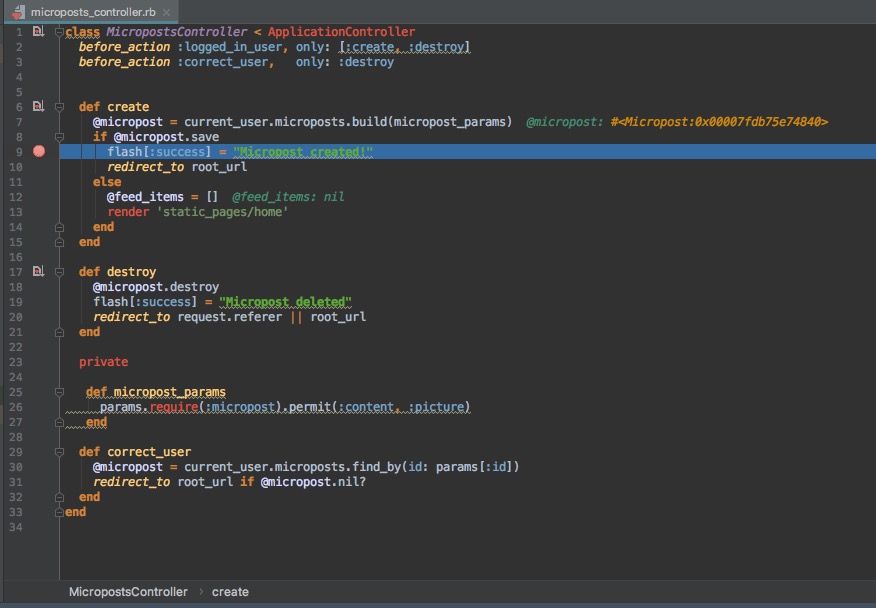
With RubyMine, you don’t need to add binding.pry. Instead, set a breakpoint at the location you want to investigate, like this:
Next, select Debug from the Run menu.
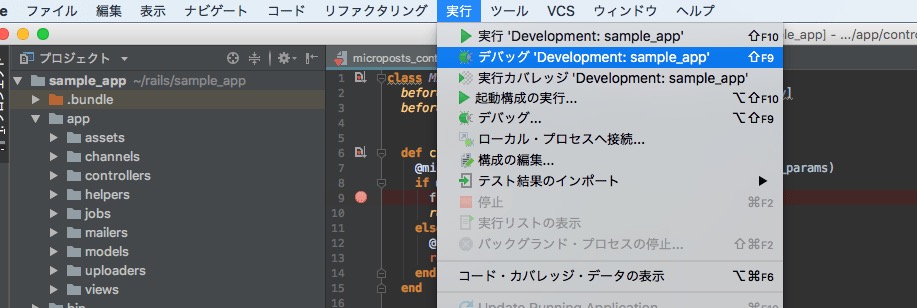
Finally, just run the Debug command.

I still haven’t mastered RubyMine, but I’m working hard to get better at it.
Here is a referral link for discounted licenses:
Discounts applied for new licenses through this referral