Created a Slack app with API Gateway and Lambda
I had the opportunity to create a Slack app, so I decided to write a blog post about it.
The App I Made
Everyone on the team can choose sushi or pizza, and the selected item is delivered to the remote worker’s home. It’s a very convenient Foods Bot.
The flow is really simple:
slack → api gateway → lambda → sushi shop or pizza shop
What I Used
- Serverless Framework
- API Gateway
- Lambda
- Bolt
I won’t go into the details of Serverless Framework or the specifics of AWS here. If you haven’t done at least the tutorials, you probably won’t understand this explanation.
Prerequisite Knowledge
There are some things you should know before making this Slack app.
First is Bolt provided by slack.
Slack has Japanese documentation, which is helpful for Japanese developers.
I recommend starting with the beginner’s guide and basic concepts by actually trying them out.
The official docs also introduce how to deploy to AWS, which is useful: Deploying to AWS Lambda
Also, check out the slack api
For designing Slack app UIs online, use Block Kit Builder. I recommend checking it out in advance.
Creating API Gateway and Lambda
For a basic Hello World example, check the official documentation:
One thing that is slightly under-explained is the layer part.
This article might be helpful: Creating an AWS Lambda layer with serverless framework (node.js)
This is fine for a Hello World level implementation, but in reality, you’ll likely want to split things up as you add more functionality. Here’s how I do it.
First, here’s the serverless.yml:
service: slack-api

frameworkVersion: '2'

plugins:
  localPath: './layer-package/nodejs/node_modules'
  modules:
    - serverless-deployment-bucket

provider:
  name: aws
  runtime: nodejs14.x
  region: ${opt:region, 'us-east-1'}
  stage: ${opt:stage, 'development'}
  lambdaHashingVersion: 20201221
  deploymentBucket:
    name: ${self:service}-architect-bucket-${self:provider.stage}
    serverSideEncryption: AES256
  environment:
    SLACK_SIGNING_SECRET: 123456789
    SLACK_BOT_TOKEN: token-123456789

resources:
  # api/role
  - ${file(./api/slack/role/operation-event.yml)}

package:
  individually: true
  patterns:
    - '!*.md'
    - '!api/**'
    - '!*.json'
    - '!node_modules/**'
    - '!Makefile'
layers:
  layerPackage:
    path: layer-package

functions:
  slackOperationEvent:
    package:
      patterns:
        - api/slack/operation-event.js
    handler: api/slack/operation-event.handler
    events: ${file(./api/slack/slack.yml):slack_operation_event}
    role: !GetAtt OperationEventRole.Arn
    layers:
      - !Ref LayerPackageLambdaLayer
In my case, I create role, api gateway, and layer components separately from the start, so it looks like this. Also, the environment variables SLACK_SIGNING_SECRET and SLACK_BOT_TOKEN are necessary when using bolt with lambda.
api gateway is set up as follows:
slack.yml
slack_operation_event:
  - http:
      path: slack
      method: post
Creating a Shortcut
First, use the Slack API shortcut feature to create a Slack form.
Creating and handling shortcuts
You can easily create the form layout using Block Kit Builder.
The Lambda function looks like this:
// slack/bolt
const { App, AwsLambdaReceiver } = require('@slack/bolt');

// Initialize your custom receiver
const awsLambdaReceiver = new AwsLambdaReceiver({
  signingSecret: process.env.SLACK_SIGNING_SECRET
});

const app = new App({
  token: process.env.SLACK_BOT_TOKEN,
  receiver: awsLambdaReceiver,
  // The `processBeforeResponse` option is required for all FaaS environments.
  // It allows Bolt methods (e.g. `app.message`) to handle a Slack request
  // before the Bolt framework responds to the request (e.g. `ack()`). This is
  // important because FaaS immediately terminate handlers after the response.
  processBeforeResponse: true
});
// foods shortcut
app.shortcut('foods', async ({ ack, body, client }) => {
  // Confirm the command request
  await ack();

  try {
    const result = await client.views.open({
      // Pass the appropriate trigger_id within 3 seconds of receiving it
      trigger_id: body.trigger_id,
      // Include the view value in the payload
      view: {
        type: 'modal',
        // callback_id is an identifier to distinguish the view
        callback_id: 'operation_view',
        title: {
          type: 'plain_text',
          text: 'foods Bot'
        },
        blocks: [
          {
            type: 'header',
            text: {
              type: 'plain_text',
              text: 'Foods'
            }
          },
          {
            type: 'section',
            text: {
              type: 'mrkdwn',
              text: 'Please select your favorite food.'
            }
          },
          {
            type: 'divider'
          },
          {
            type: 'section',
            text: {
              type: 'mrkdwn',
              text: 'Food'
            },
            accessory: {
              type: 'static_select',
              placeholder: {
                type: 'plain_text',
                text: 'Select an item',
                emoji: false
              },
              options: [
                {
                  text: {
                    type: 'plain_text',
                    text: 'Sushi'
                  },
                  value: 'sushi'
                },
                {
                  text: {
                    type: 'plain_text',
                    text: 'Pizza'
                  },
                  value: 'pizza'
                }
              ],
              action_id: 'foods'
            }
          },
          {
            dispatch_action: true,
            type: 'input',
            element: {
              type: 'plain_text_input',
              action_id: 'email'
            },
            label: {
              type: 'plain_text',
              text: 'Email Address',
              emoji: false
            }
          }
        ],
        submit: {
          type: 'plain_text',
          text: 'Submit'
        }
      }
    });
    console.log(result);
  } catch (error) {
    console.error(error);
  }
});

// Handle the Lambda function event
module.exports.handler = async (event, context, callback) => {
  const handler = await app.start();
  return handler(event, context, callback);
};
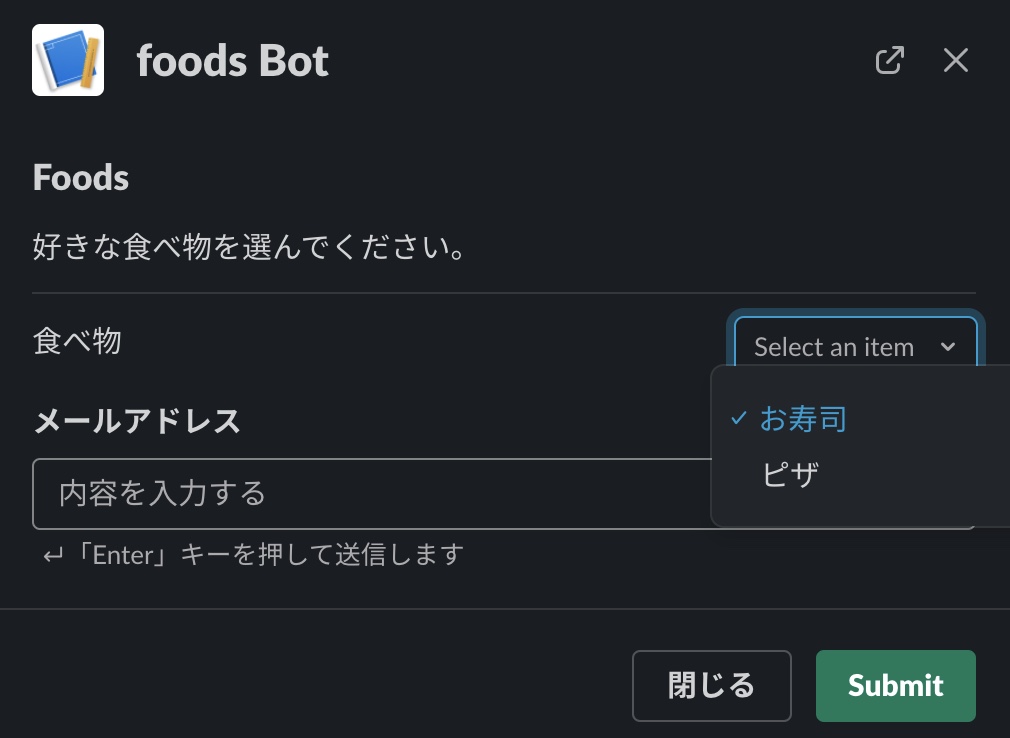
With this, when a user selects the shortcut, a modal appears with a form to select sushi or pizza and enter an email address.
Listening for Actions
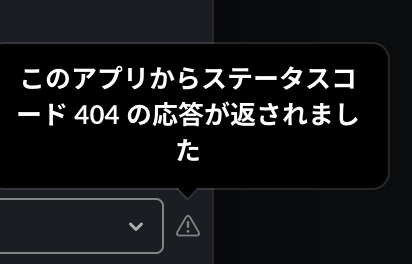
Slack requires that responses using ack() are made within 3 seconds. In this case, when a user selects either sushi or pizza in the select box, you need to respond with ack() immediately.
Honestly, it will still work without it, but an error will be logged in CloudWatch.
ERROR [ERROR] An incoming event was not acknowledged within 3 seconds. Ensure that the ack() argument is called
Also, Slack will warn you, so it’s best to handle this properly.
Reference: Responding to actions
This time, since the action_id is foods, we handle it as follows:
lambda
app.action('foods', async ({ ack }) => {
  await ack();
});
With this, the error will no longer appear.
Checking Events
We use app.view to verify information sent from the modal.
Reference: Event acknowledgment
Based on this reference, I created the following. Since this is just for internal company use, I kept the validation minimal without getting too fancy.
The values are stored in view.state.values, but since they were stored under unique IDs, I used the Object.keys() method.
After that, it’s just a matter of writing any processing you want to execute.
app.view('operation_view', async ({ ack, body, view, client }) => {
  // Confirm the data submission event from the modal
  console.log('operation_view');
  await ack();
  console.log(`view ${view}`);

  // Implement what you want to do with the input values here

  console.log(`view.state.values: ${JSON.stringify(view.state.values)}`);
  const stateValues = view.state.values;
  const objectKeys = Object.keys(stateValues);

  // Format the data sent from Slack into JSON
  async function setJson () {
    const formatJson = {};
    return new Promise((resolve) => {
      for (const element of objectKeys) {
        if (stateValues[element].foods) {
          formatJson.foods = stateValues[element].foods.selected_option.value;
        }
        if (stateValues[element].email) {
          formatJson.email = stateValues[element].email.value;
        }
      }
      resolve(formatJson);
    });
  }

  // Check email validity
  async function emailValidates () {
    const setJsonResults = await setJson();
    return new Promise((resolve) => {
      if (setJsonResults.email) {
        // eslint-disable-next-line no-useless-escape
        const isEmail = /^[\w-\.]+@([\w-]+\.)+[\w-]{2,4}$/;
        if (isEmail.test(setJsonResults.email)) {
          setJsonResults.status = 'success';
          resolve(setJsonResults);
        } else {
          setJsonResults.status = 'err';
          setJsonResults.message = 'The email entered is not valid.';
          resolve(setJsonResults);
        }
      } else {
        setJsonResults.status = 'err';
        setJsonResults.message = 'The email entered is not valid.';
        resolve(setJsonResults);
      }
    });
  }

  // Various processing you want to execute

  // Return a response
  async function sendMessageToUser () {
    return result.message;
  }

  const msg = await sendMessageToUser();
  console.log(msg);

  const val = view.state.values;
  const user = body.user.id;

  const results = (user.input, val);

  if (results) {
    msg;
  }

  // Send a message to the user
  try {
    await client.chat.postMessage({
      channel: user,
      text: msg
    });
  } catch (error) {
    console.error(error);
  }
});
And with that, it’s complete.
The Slack API is quite handy. This time I only created a simple app for internal company use, but since it can be integrated with AWS, it seems like it could be applied to new services as well.
By the way, there’s no actual program that delivers sushi or pizza to your home. I changed that detail for the blog post. Haha