How to add authentication to a static site (S3) using Cognito
There are many cases where you want to make a static site under development or an internal document visible only to specific people. How can you achieve this on AWS?
This time, I’ll show you how to do just that!
Requirements
- The content is a static site
- IP restriction is required
- Use Google authentication for login
Architecture
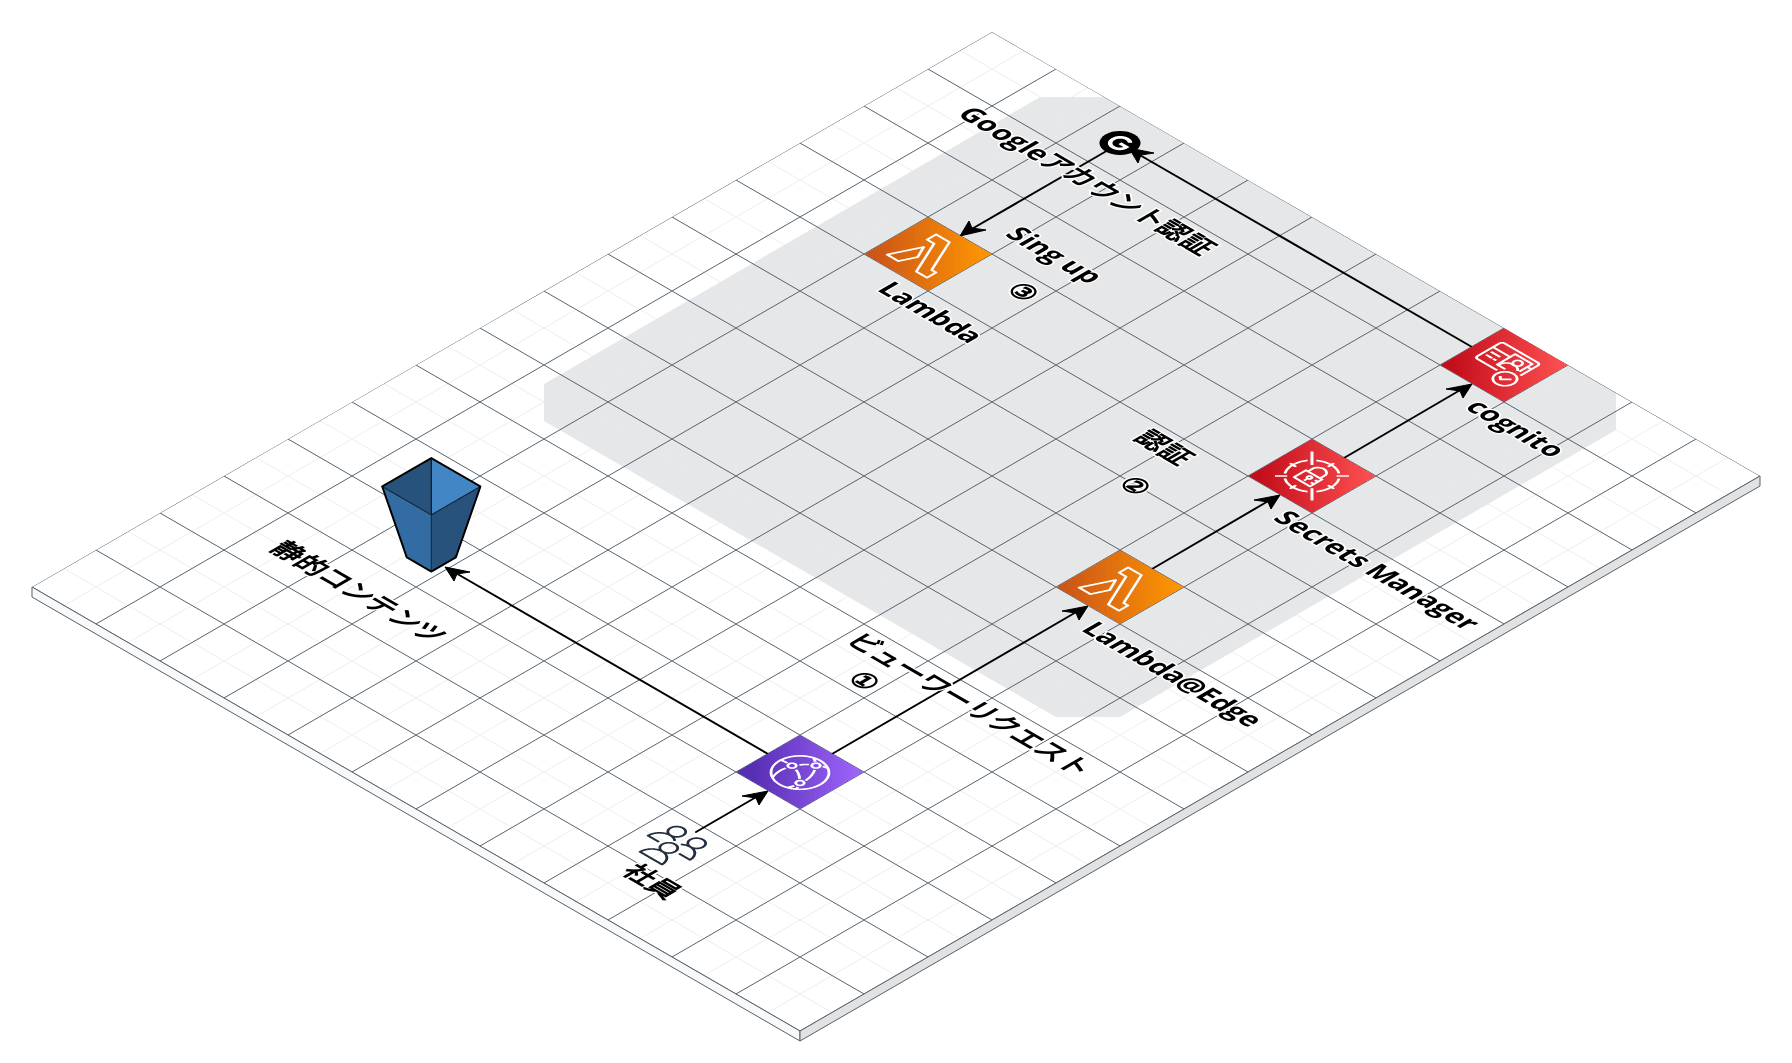
I considered the above architecture. Basically, content is delivered from S3 via CloudFront, and Lambda@Edge is used as a trigger for CloudFront events to integrate Cognito and Google authentication.
I implemented this with AWS CDK (TypeScript) and Lambda in TypeScript.
1. CloudFront Viewer Request Trigger
Before a request from CloudFront reaches the S3 content, you need to check if the request is valid. CloudFront distributions allow you to attach up to 4 Lambda functions as triggers for specific CloudFront events. This feature is used here. The Lambda used by CloudFront is called Lambda@Edge. Unlike regular Lambda, it only runs on Node.js, only in the Northern Virginia region, and you can’t use environment variables, among other restrictions.
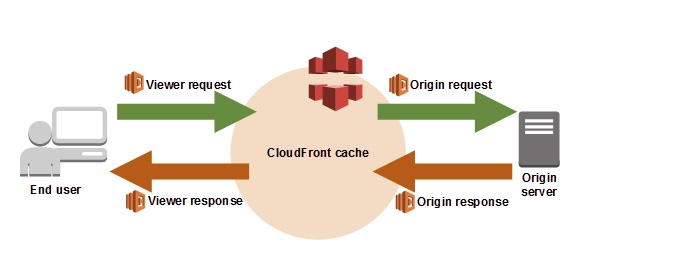
CloudFront events that can trigger Lambda@Edge functions:
- Viewer Request ← This is the trigger used here
- Origin Request
- Origin Response
- Viewer Response
2. Issue Authentication Token
With Lambda@Edge, you need to write complex logic to call the Cognito API and issue an authentication token, but AWS Labs provides a handy library for this, so use it.
It’s actually very easy to use!
const { Authenticator } = require('cognito-at-edge');

const authenticator = new Authenticator({
  // Replace these parameter values with those of your own environment
  region: 'us-east-1', // user pool region
  userPoolId: 'us-east-1_tyo1a1FHH', // user pool ID
  userPoolAppId: '63gcbm2jmskokurt5ku9fhejc6', // user pool app client ID
  userPoolDomain: 'domain.auth.us-east-1.amazoncognito.com', // user pool domain
});

exports.handler = async (request) => authenticator.handle(request);
Since Lambda@Edge does not allow the use of environment variables, you have to hard-code the Cognito keys like this, but to avoid this, you can use AWS Secrets Manager to manage your API keys securely.
If you are using AWS CDK or CloudFormation, it’s better to reference the Cognito keys in Secrets Manager. You can create Cognito → Refer to Cognito keys using Ref function in Secrets Manager → Use AWS SDK to retrieve the secret from AWS Secrets Manager.
One thing to be careful about when using the Secrets Manager SDK is the response speed. If your code fetches the Cognito keys from Secrets Manager every time, the response might be slow, taking about 2 seconds, which is relatively slow for an S3 + CloudFront setup. To avoid this, you should use Lambda's in-memory cache. By using the in-memory cache, the first request might be slow, but subsequent requests will be fast as they will use the cached data.
Setting the Index Document
One tricky thing about hosting a static site with CloudFront + S3 is setting the Index Document.
Many static site generators, including Hugo (which this site uses), do not include the index.html file by default.
Path  https://shou2017.com/about/

This will not be generated

Path https://shou2017.com/about/index.html
Web servers like Apache and Nginx display index.html by default, and popular static site hosting services like Netlify and GitHub Pages also handle this automatically. However, with CloudFront + S3, this is not the case. Therefore, you need to add a process in Lambda@Edge to append index.html when there is a request for a URL without a file name. Without this, a 404 error will be returned.
function handler(event) {
    var request = event.request;
    var uri = request.uri;

    // Check whether the URI is missing a file name.
    if (uri.endsWith('/')) {
        request.uri += 'index.html';
    }
    // Check whether the URI is missing a file extension.
    else if (!uri.includes('.')) {
        request.uri += '/index.html';
    }

    return request;
}
By the way, if you implement static site hosting with just S3, there is a setting item for the index document, so you don’t need to prepare a separate function.
CloudFront Functions cannot be combined with Lambda@Edge
This is another tricky part. You cannot combine CloudFront Functions and Lambda@Edge for the Viewer Request.
I actually got stuck on this. After adding the authentication feature using Cognito@Edge to Lambda@Edge, I realized I needed to add the index document, and I tried to separate the functions for authentication and index document, which led to the confusion.
CloudFront Functions run before Lambda@Edge, so I mistakenly thought it would be fine to implement it this way…
IP Restriction
IP restriction can also be achieved by attaching AWS WAF to CloudFront, but this time we will do it with Lambda@Edge. AWS WAF has a surprisingly high fixed cost, and if you only need IP restriction, Lambda@Edge is sufficient.
// Set the IPs that are allowed to access
const IP_WHITE_LIST = [];

async function handler(request: any) {
  // Check if the client IP is in the allowed IPs
  const isPermittedIp = IP_WHITE_LIST.includes(
    request.Records[0].cf.request.clientIp
  );
  if (isPermittedIp) {
    // Process if true
  } else {
    const response = {
      statusCode: 403,
      statusDescription: "Forbidden"
    };
    // Process if false
    return response;
  }
}
export {handler};
Sign Up
Implementation of Sign Up using Google authentication.
There is a guide on AWS, so I will refer to it to create this.
How do I set up Google as a federated identity provider in Amazon Cognito user pools?
- Create a Google API Console project
- Configure the OAuth consent screen
- Obtain OAuth 2.0 client credentials
- Configure Google as a federated IdP in the user pool
Most of the work is just clicking through the console, so the setup should be quick.
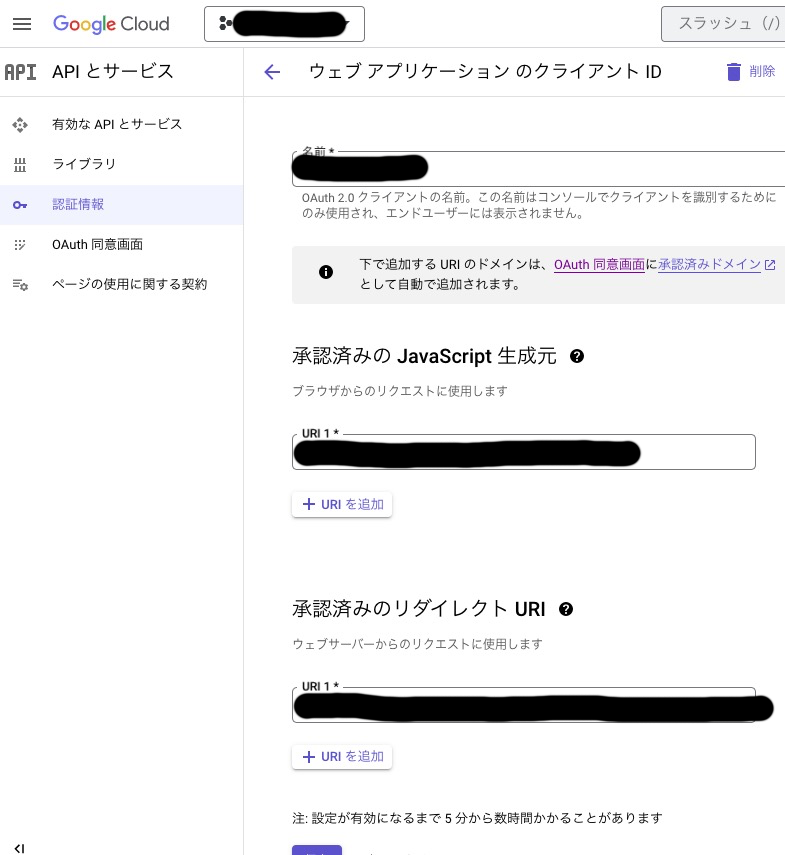
Once the above settings are complete, your web application client ID screen should look like this:
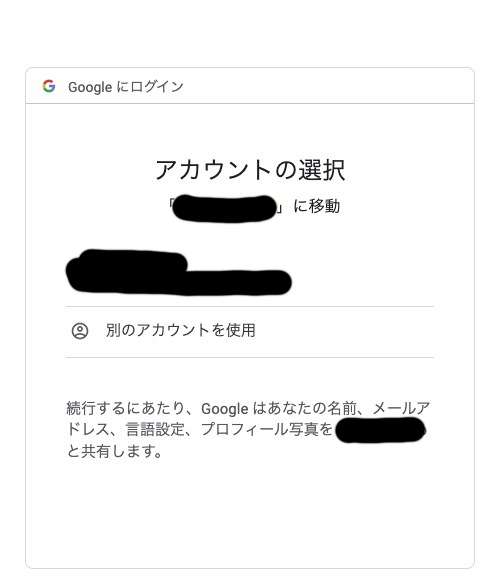
The OAuth consent screen is the familiar screen that you often see.
Implement Lambda Trigger for Sign Up
There might be cases where you want to verify the email address of users signing up through Google authentication. The lambda trigger comes in handy here.
First, with the default Google authentication, the email information is not passed to Cognito, so you need to set the Email in the attribute mapping of the user pool.
// AWS CDK
new UserPoolIdentityProviderGoogle(this.stack, "Google", {
  userPool,
  clientId,
  clientSecret,
  scopes: ["Email"],
  attributeMapping: {
    email: ProviderAttribute.GOOGLE_EMAIL
  }
});
Next, create the lambda that will be attached as a trigger. Since this is a regular Lambda, there are no restrictions like region or environment variables. In this example, it simply checks if the domain of the email address is correct, and if so, allows the Sign Up to proceed; otherwise, it returns an error.
// signUpTriggerLambda
async function handler(event: any) {
  const email = event.request.userAttributes.email;
  const domain = email.substring(email.indexOf("@") + 1);
  if (domain !== "shou2017.com") {
    console.error("This user cannot be registered");
    return null;
  } else {
    return event;
  }
}
export {handler};
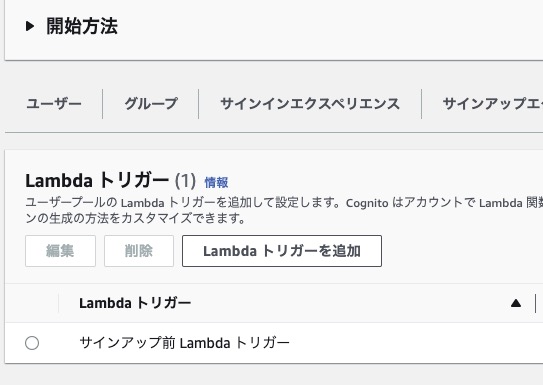
Attach the signUpTriggerLambda you just created to the Pre Sign-Up Lambda Trigger in the lambda triggers.
// AWS CDK
this.userPool.addTrigger(
  UserPoolOperation.PRE_SIGN_UP,
  this.signUpTriggerLambda
);
After deploying, you should see it attached like this:
And that’s it!